Attack vs Defend: Which Side Should You Pick?
Command An Army splits every match into attackers and defenders. Here is how each side actually plays, and how to pick the role that fits your army build.

FAQ
What is the difference between attacking and defending in Command An Army?
Which side is easier for beginners?
Does my army composition change based on my side?
Can you switch sides mid-match?
Every match of Command An Army asks you the same question before the first sword is drawn: do you break their line, or hold yours? The official pitch frames it as a real choice — “CHOOSE to either ATTACK or DEFEND against enemies” — and two days into launch, the player base is already splitting into attack-brained and defense-brained camps. This guide covers how each side actually plays, which armies suit each role, and how to use your off-role to get better at your main one.
How does the attacking side play?
Attacking is tempo ownership. You decide which capture point gets pressured, when the push starts, and whether a probe is a feint or the real thing. The defender has to cover everything; you only have to win somewhere.
That freedom comes with a clock. An attack that stalls — a frontal push into a set shield line, a flank that gets read and cut off — burns units and momentum with nothing to show for it. Successful attacking in launch-week lobbies looks like:
- Committing fully to one point. Half-pushes against a formed defense lose every time. Two committed waves at one point beat four scattered probes at three.
- Using speed before contact. Cavalry and fast infantry are at their most valuable in the approach — get to the flank while the defender’s formation is still facing where you want them to look.
- Reading the counter-order. A defender who re-blocks into your push is conceding the tempo. A defender who counter-attacks is gambling. Both are exploitable — see the formations guide for the order vocabulary.
How does the defending side play?
Defending is positional strength with a reaction tax. Your line starts formed, your capture points are known ground, and attackers have to come to you. What you give up is initiative: the attacker chooses the moment, so your discipline is in not wasting readiness.
Launch-week defense that wins looks like:
- Anchoring the line where it matters. Heavy Shields and Sword & Shield frontliners hold the approach lanes; the objective decides which lanes those are — that math is in the capture points guide.
- Ranged units with a protected home. Ranged classes break pushes that collide with your line. They also die instantly to a flank that reaches them, so position them behind the shields, not beside them.
- Punishing overextension, not chasing kills. The moment a defender’s whole line leaves the point to chase a wounded attacker, the point is free real estate. Hold, let them break, clean up.
Which side fits your army build?
Your four-unit lineup usually leans one way:
| Your army leans… | You probably play… | Why |
|---|---|---|
| Cavalry + fast infantry | Attack | Speed only pays when you choose where the fight starts |
| Heavy Shields + Ranged | Defense | A set line is exactly what those units want |
| Balanced (frontline + range + flex) | Either | Play the side with fewer players, learn both roles |
If you are still assembling that lineup, the army building guide walks the four-slot system, and the unit type overview explains what each class is actually for.
What does each side actually need to win?
Condensed to the essentials — the checklist to hold in your head during queue:
| Attack needs | Defense needs | |
|---|---|---|
| Tempo | One committed push, not three probes | Early set line, blocked before contact |
| Objective | Bodies on the point during the fight | One body on the point, always |
| Failure mode | Stalling and bleeding units | Chasing kills off the point |
| The clock | favors whoever is winning the points, not the kills | the same, honestly — play the points |
Read the table before the match starts and you already out-plan half the lobby — most launch-week losses trace to a team that never decided which of these columns it was playing.
How do you tell which side your army wants?
Three questions, in order:
- Can your four reach a fight fast? Cavalry and mobile infantry in the lineup tilt you toward attack — speed you cannot use on defense is a wasted slot.
- Can your line survive a charge without retreating? Two shield-class units or a braced spear front tilt you toward defense — that stability is worth more when the enemy must come to you.
- Do you enjoy the side? Honestly weighted: launch week is for learning, and you play better on the side you like. The tips and tricks page covers the drills that transfer either way.
A balanced build answers “either” — and then the right answer is whichever side the lobby is short on, because queue-side generosity is also matchmaking karma.
Why should you play your weaker side anyway?
Because each side is a mirror lesson. Three attack matches teach you exactly where defensive lines feel safest — which is where they are weakest. Three defense matches teach you which attacking shapes made you panic, which is what to copy.
Players who understand both sides issue better formation orders on both, because they know what the enemy commander is seeing. In a game this young, that understanding is the entire edge — there is no years-old meta to copy yet, just commanders who have seen both sides of the hill.
New to the game entirely? Start with the beginner guide — it covers the pre-match checklist (including the free 14,400 Gem codes) before you pick a side.
Gallery
Next objectives
Keep Reading, Commander
Related Articles
guides
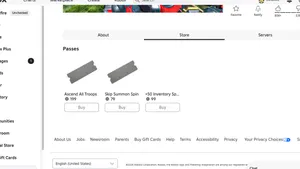
Command An Army Game Passes: Every Pass, Price, and Honest Verdict
Every Command An Army game pass listed with its Robux price and honest verdict — what each pass changes and which ones are actually worth it.
guides
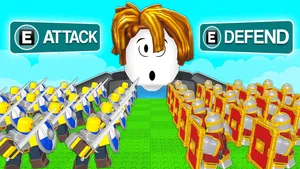
Command An Army Maps Guide: Every Battlefield and Its Capture Points
How Command An Army battlefields work: attack-and-defend objective flow, lettered capture points, 12-player matches — and the honest state of the official map list.
units
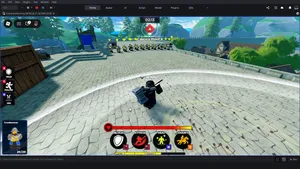
Crossbow in Command An Army: Official Record, Range Nerf, and First Evolution
Sneak-peek footage, a September 13 range nerf, and UPDATE 5's Crossbowman → Pavise Crossbowman evolution — the crossbow family finally has a documented path.
Was this helpful?
Thanks for the feedback!